Radiator Simple WiFi Authentication Deployment Guide
Deploying ‘Radiator Cloud Simple WiFi Authentication’ Azure Managed Application
Prerequisites
- As for all Azure applications, your organisation needs to have an active Azure subscription. The Azure Free subscription will not work.
- To deploy the application, you must have at least Contributor permissions for your tenant.
Deployment process
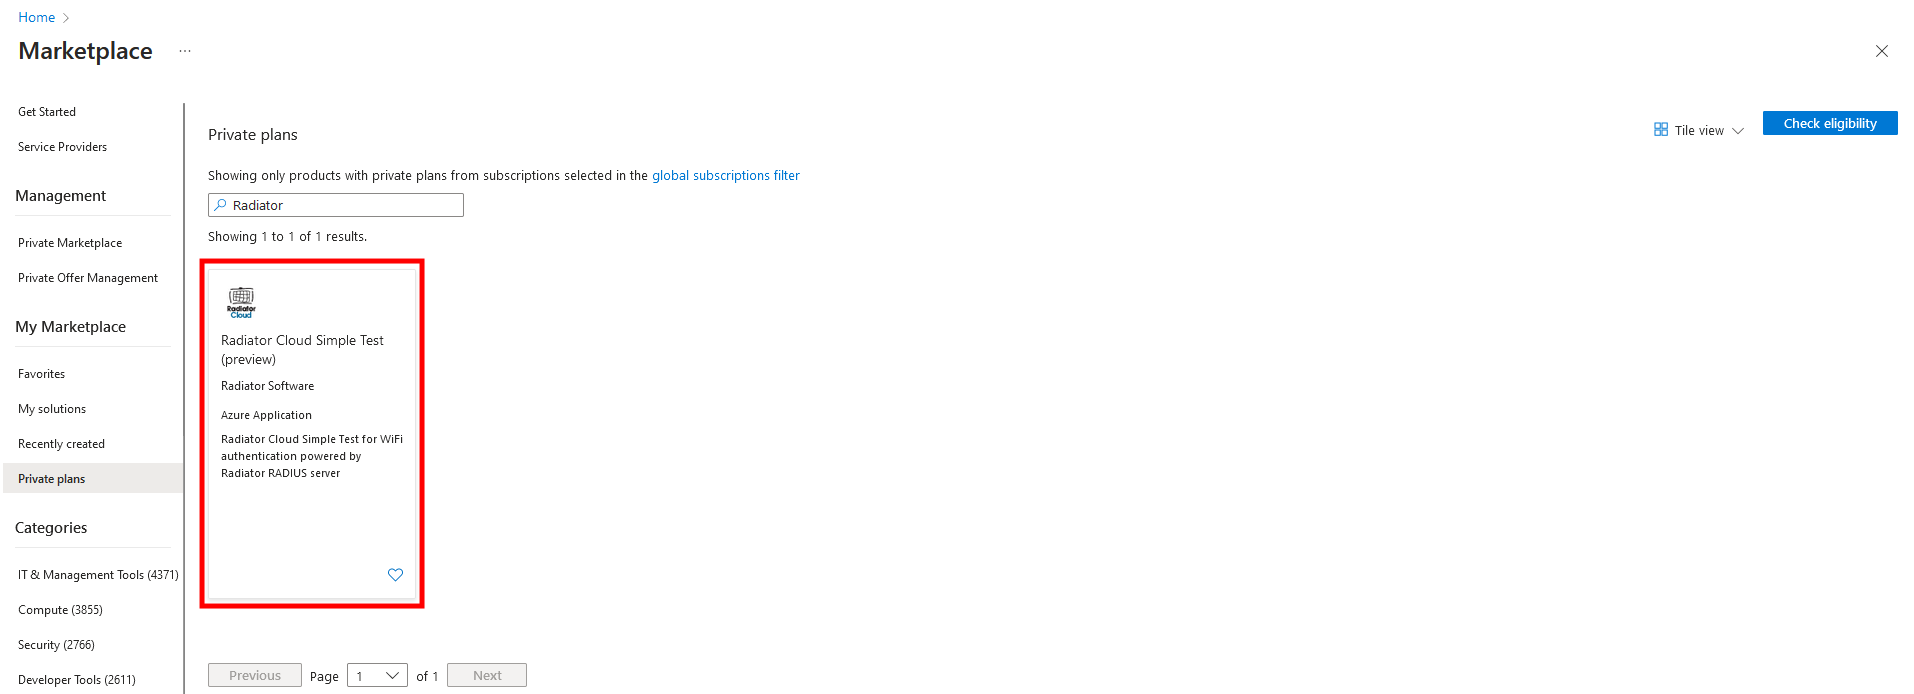
Find ‘Radiator Cloud Simple WiFi Authentication’ from Azure Marketplace and click open the product page.
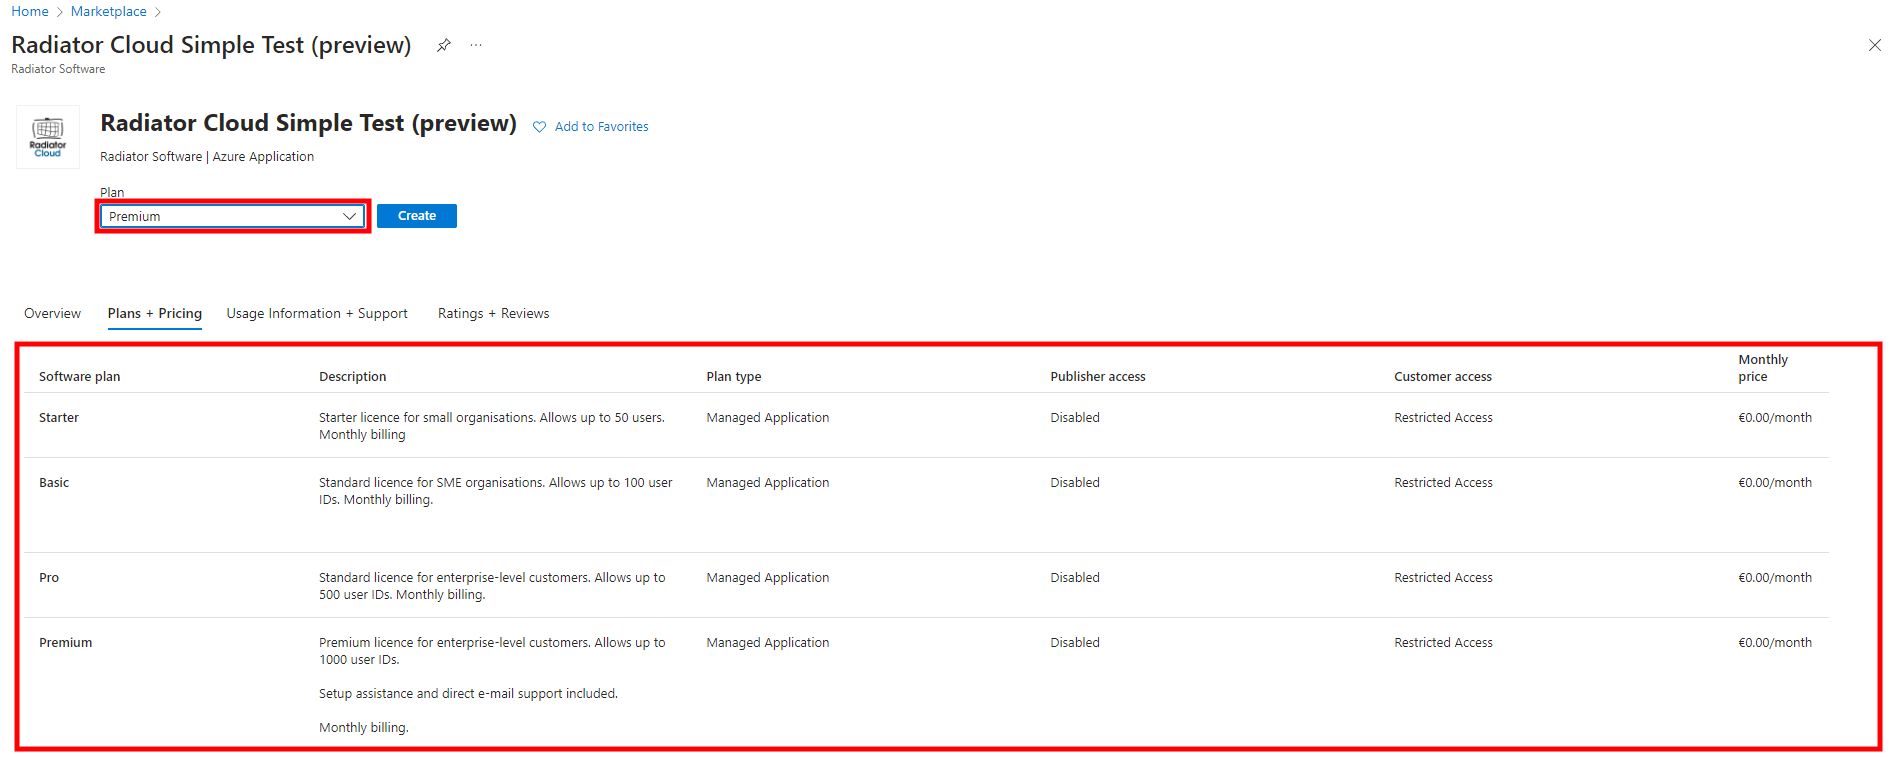
Click ‘Plans + Pricing’
Choose the right plan for your organisation based on the number of users you have.

Click open the ‘Plan’ drop-down menu and choose the correct plan.
Afterwards, click ‘Create’
Progression to the next view can take up to 30 seconds.
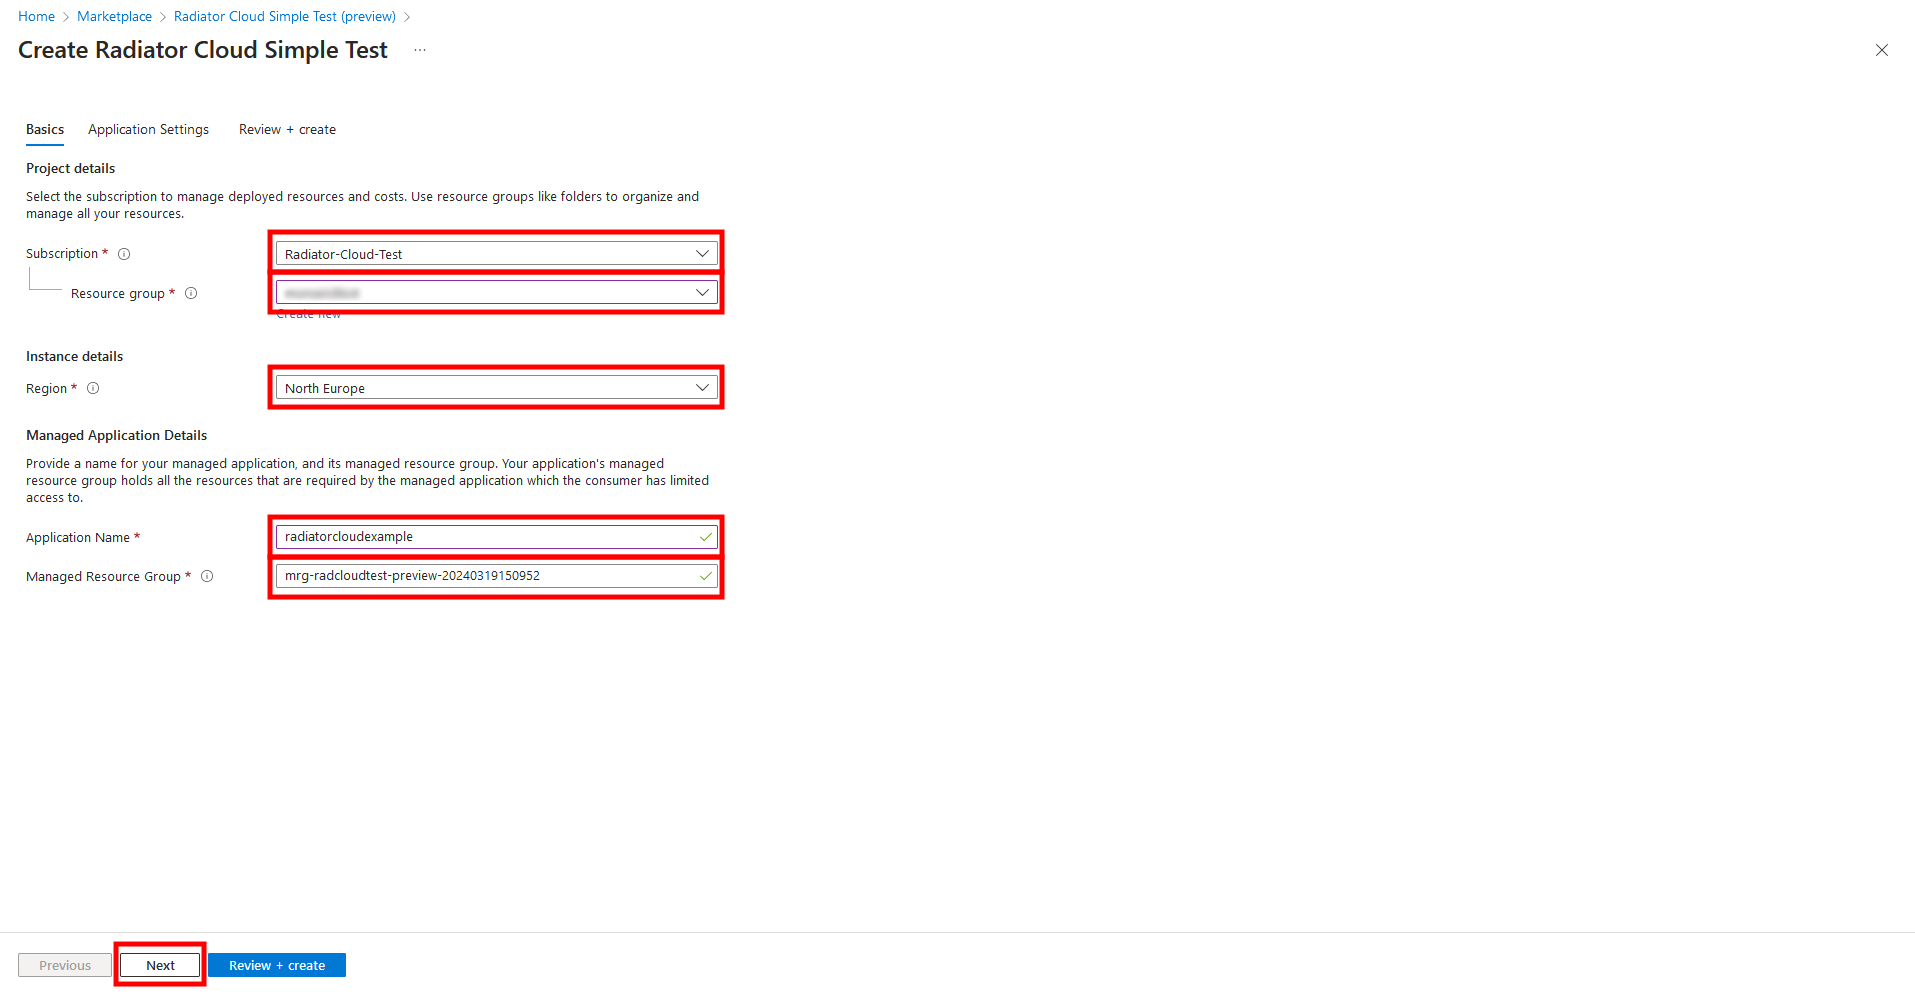
In the new view, you have five boxes that need to be filled: Subscription, Resource Group, Region, Application name and Managed Resource Group.
- Subscription: Choose a valid Azure subscription from the drop-down menu. This should likely be the one where your other Azure Marketplace applications are running. The permissions within this Subscription will determine which Azure users can access the management view of the application.
- Resource Group: Choose a Resource Group from the selected Subscription, or create a new one.
- Region: The region will approximately specify the Azure application’s physical location. It is recommended to choose one closest to your organisation’s physical location.
- Application name: Choose a 1-30 lowercase alfanumeric character long name for your application. This will be the name displayed for the application and also the prefix to the application’s resources.
- Managed Resource Group: Choose a unique name for the application’s Managed Resource Group. Azure will automatically suggest a name.
After filling the five boxes, press ‘Next’ at the bottom of the view.
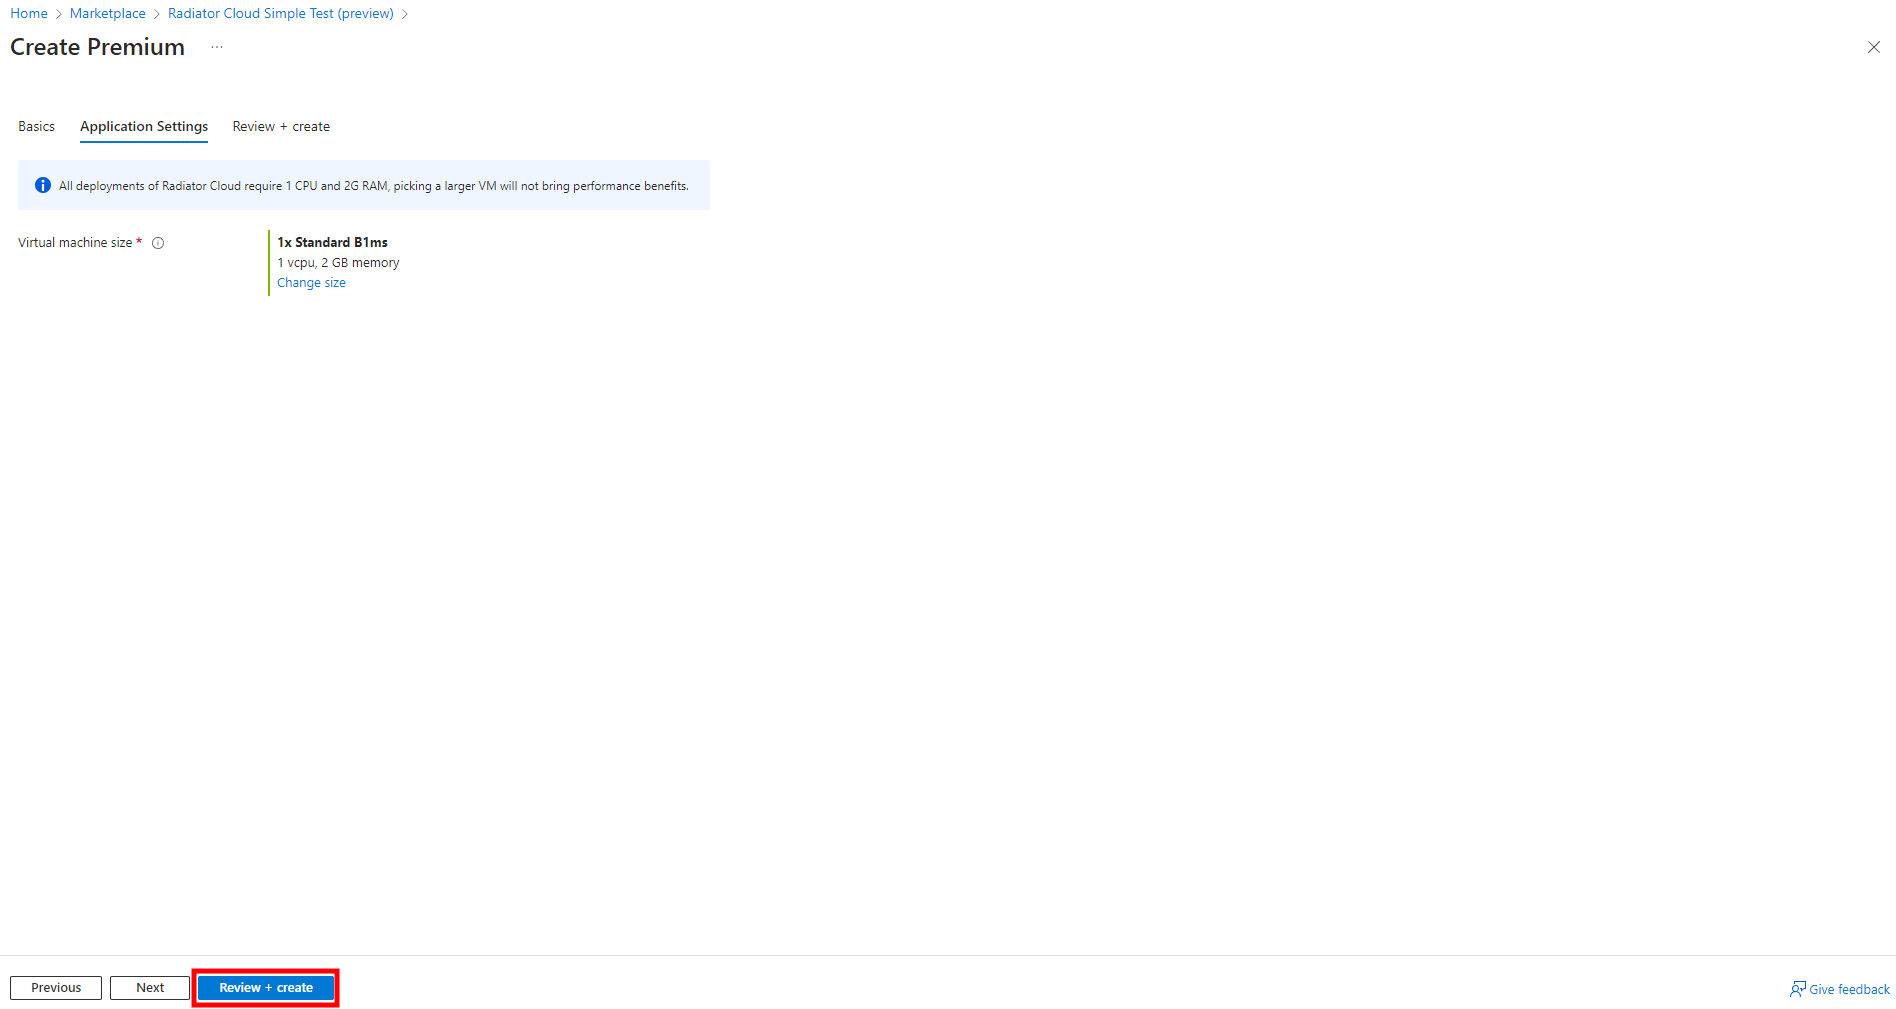
In this view, you choose the virtual machine you want the application to run on.
The application requires 1 vCPU and 2GB memory for all plans.
We recommend choosing the cheapest VM that meets the above criteria.
Currently in North Europe, the recommended VM is the Standard B1ms.
There is no significant advantage in choosing a bigger machine, even for the Premium Plan customers. And as the larger machines have much higher running costs, it is beneficial to run the application on the smallest machine available.
Choose the virtual machine you want the application to run on and press ‘Review + create’.
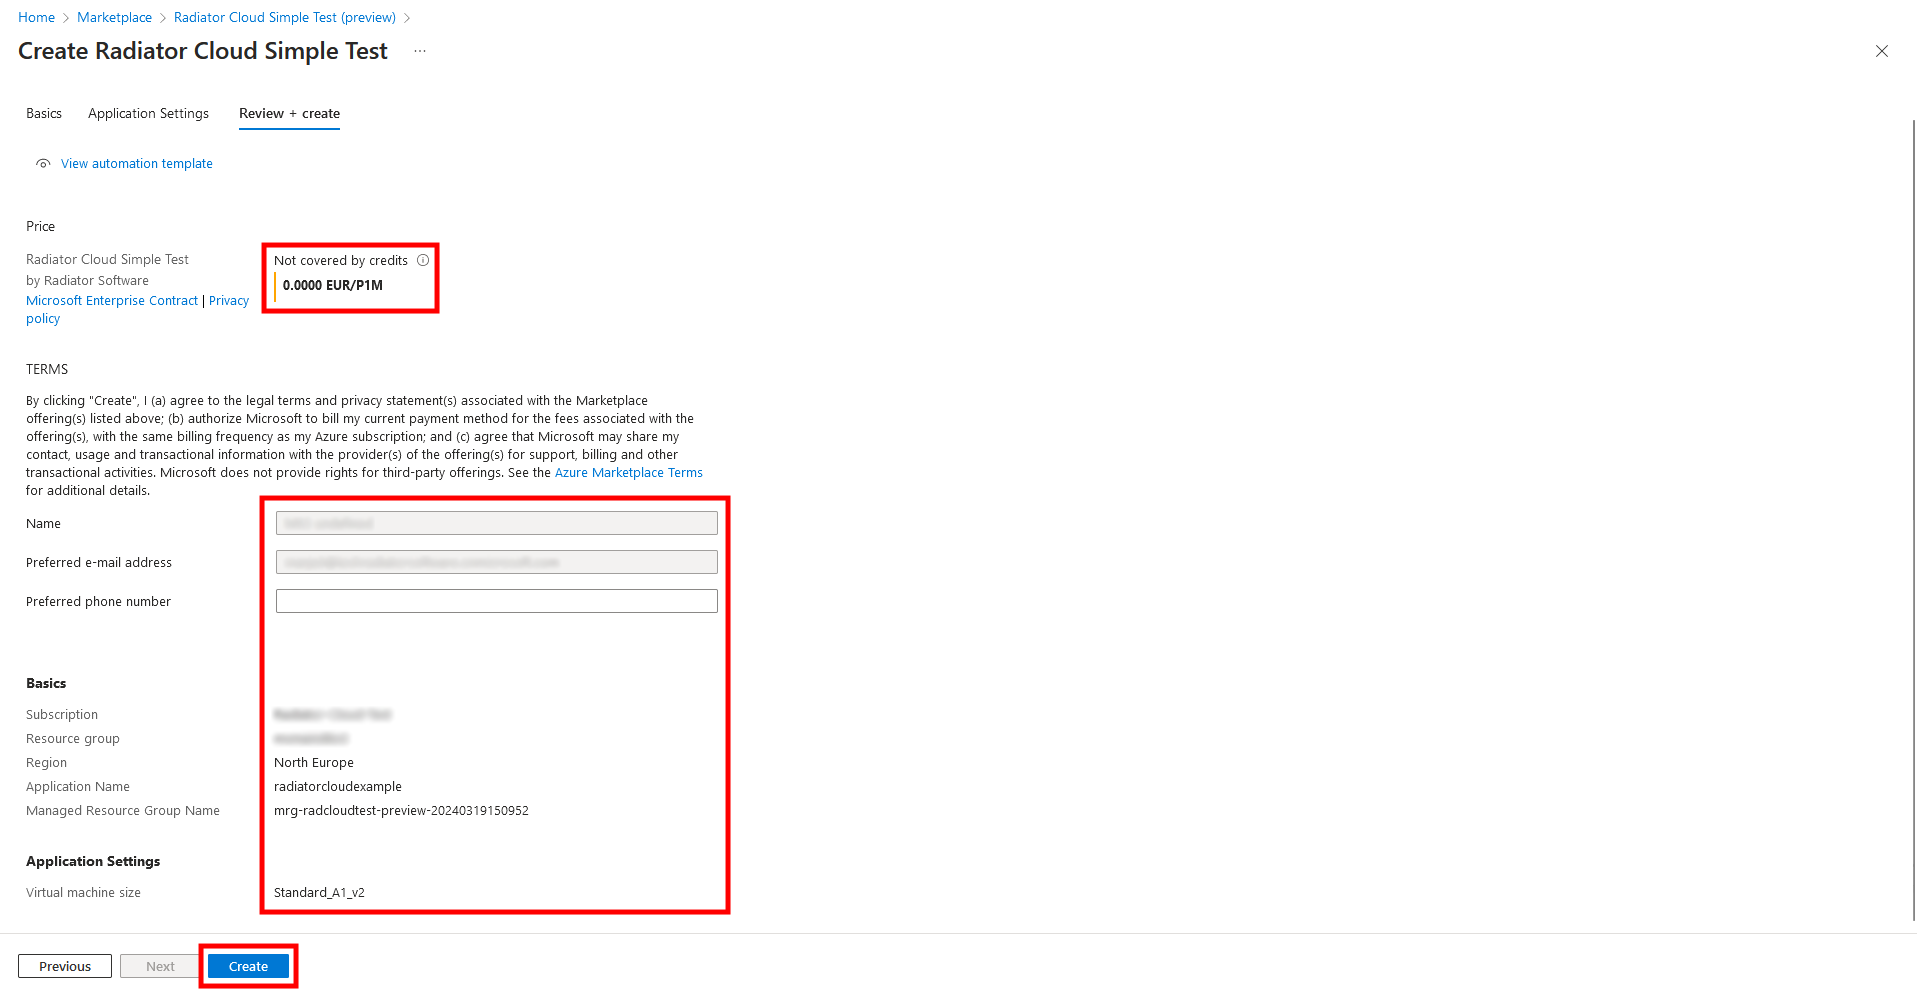
This window has an overview of the information used to create the application. Some of this has been entered by you during the deployment process and some are automatically entered based on your Entra details.
Review the information and press ‘Create’.

You will be redirected to a deployment page where you can track the progress of the deployment. The deployment will take up to 15 minutes.
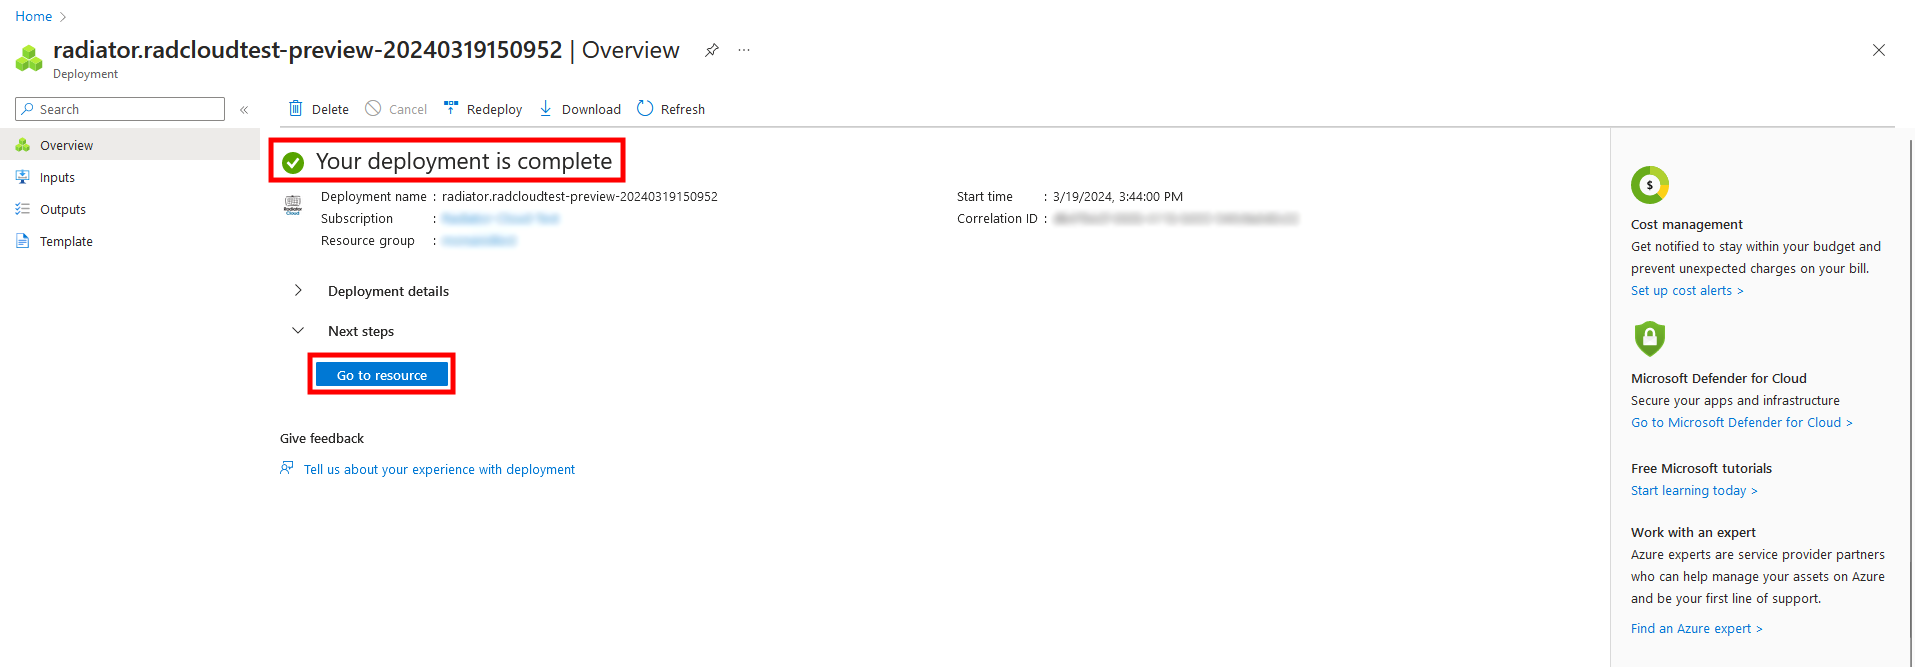
After the deployment is finished, you get the message ‘Your deployment is complete’.
Press ‘Go to resource’ to access your application.
If your deployment fails and you receive the message ‘Your deployment failed, see Deployment failed’. DO NOT PRESS REDEPLOY, as that will result in a corrupted application or a new failed deployment.
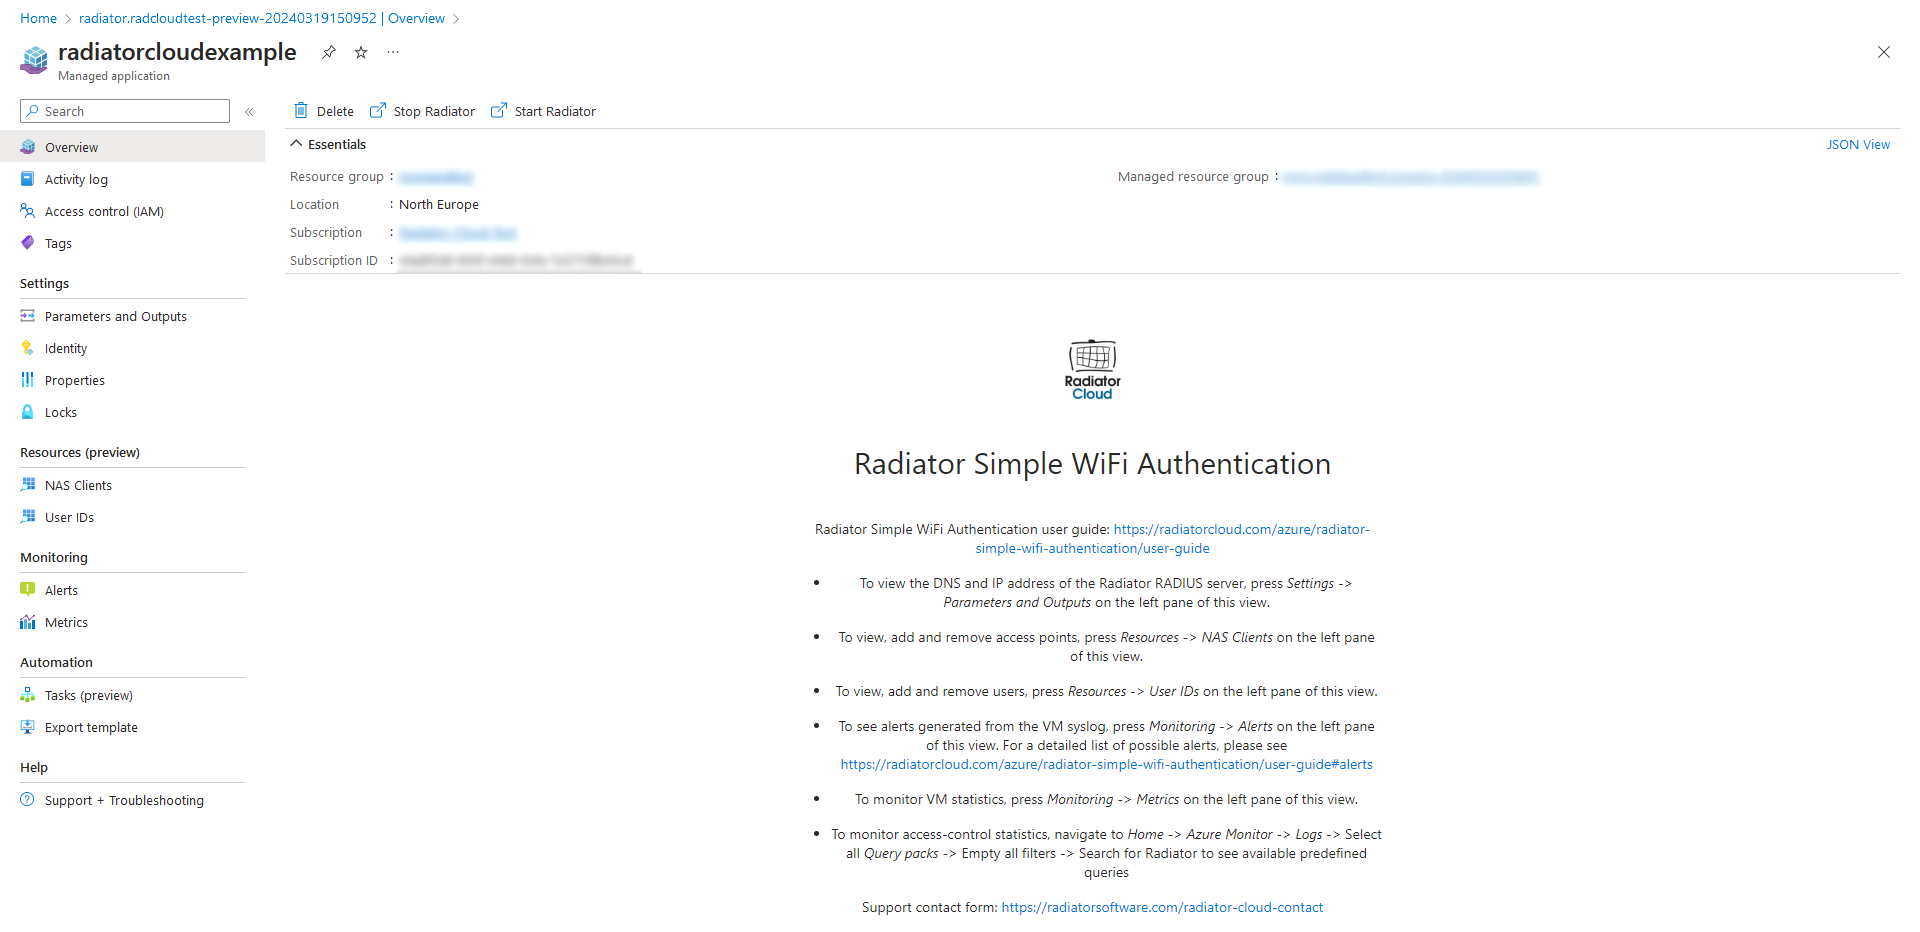
You are all set!
You can now move to the Radiator Simple WiFi Authentication User Guide for further instructions.
Deployment failed
Known issue:
If you receive the following error message:
Operation could not be completed as it results in exceeding approved Total Regional Cores quota. Additional details - Deployment Model: Resource Manager, Location: northeurope, Current Limit: 10, Current Usage: 10, Additional Required: 1, (Minimum) New Limit Required: 11. Submit a request for Quota increase at https://aka.ms/ProdportalCRP/#blade/Microsoft_Azure_Capacity/UsageAndQuota.ReactView/Parameters/… by specifying parameters listed in the ‘Details’ section for deployment to succeed. Please read more about quota limits at https://docs.microsoft.com/en-us/azure/azure-supportability/regional-quota-requests (Code: QuotaExceeded)
You have exceeded the quota of virtual machines within your chosen Azure region. Deploy into different region or remove unsused applications.
Sometimes Azure fails to deploy the application. In these cases, you will receive a view similar to this:

This happens because Azure fails to build one or more parts of the application. The information you have entered do not cause the failure.
In case of a failed deployment, you need to repeat the deployment process. DO NOT try to redeploy by pressing the re-deploy button at the top of the view. This will not work, as it will result in either a corrupted application or a new failed deployment.